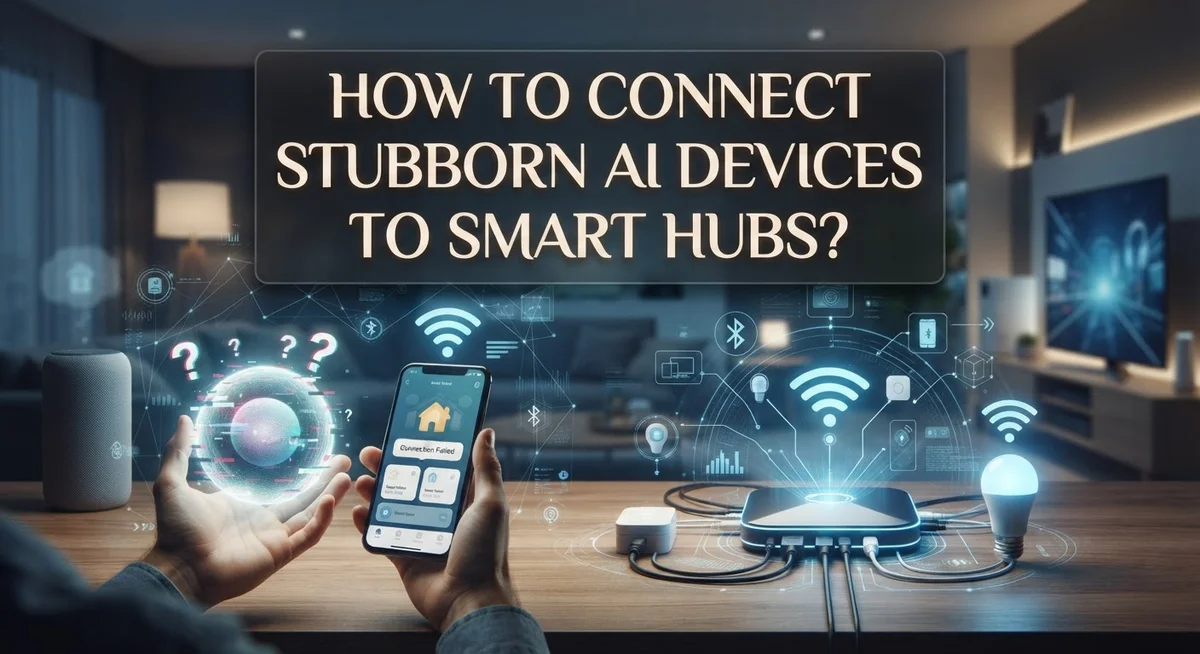
How to Connect Stubborn AI Devices to Smart Hubs?
Smart homes promise easy living. But sometimes your new AI device just won’t connect to the hub.
You press buttons. You restart the app. Still, nothing happens.
This is a common problem. Many smart devices act stubborn during setup. They refuse to show up on your network or app.
The good news? Most connection issues have simple fixes. You just need the right steps in the right order.
This guide walks you through the entire process. We start with physical setup and WiFi connection. Then we cover how to use companion apps to discover your device.
Finally, we tackle automation. You will learn why starting small beats building complex systems on day one.
By the end, you will know how to troubleshoot stubborn devices with confidence. No more frustration. Just a smart home that actually works the way it should.
In a Nutshell
Mount your hub first. Place it in a central spot. Then connect it to your WiFi network.
Use the companion app to add devices. It scans your local network or uses an API to find them. This step usually solves most “stubborn” device issues.
Change default passwords right away. This is a critical security step. Use a strong, unique password for each device and your WiFi.
Test local functionality. Disconnect your modem from the router to see if devices still work. This confirms you are not fully dependent on the cloud.
Start small with automations. Do not build twenty rules on day one. Add a few simple ones and test them before creating more.
Enable security protocols on your hub and router. This keeps your smart home safe from outside access.
Understanding Smart Hubs and AI Device Connectivity
Smart hubs act as the central command center for your AI devices. They receive commands, store settings, and coordinate communication between all connected gadgets in your home. Understanding how they work makes troubleshooting much easier.
AI devices connect to hubs through two main pathways. The first is local network connectivity, where devices talk directly to your hub without needing the internet. The second is cloud connectivity, which sends data to remote servers. Most modern hubs support both options, giving you flexibility.
When you first set up your hub, it needs to connect to your WiFi network. This connection allows the hub to discover nearby AI devices. Once connected, your companion app scans for available devices on the same network. Some devices use API connections instead, which means they communicate through specific protocols rather than direct WiFi scanning.
Default settings are rarely secure. Your hub arrives with basic credentials that anyone could exploit. Change these immediately before adding any devices. Use different passwords for your WiFi network and each device when possible.
Local network functionality is particularly important. Devices working on your local network continue operating even if your internet goes down. This means your smart home remains functional during outages. Cloud connectivity adds convenience and remote access, but local functionality provides reliability.
Understanding these basics prevents frustration later. You will know why certain devices appear or disappear from your app. You will recognize when connection issues stem from WiFi problems versus hub configuration. This knowledge transforms setup from confusing to straightforward.
Start by learning your hub’s specific documentation. Different hubs have different discovery methods and security requirements. Reading these details first saves time and prevents mistakes during installation.
Pre-Setup Checklist: What You Need Before You Begin
Before you start connecting devices, gather everything you need. This prevents frustration and wasted time later.
First, locate your smart hub device and its power cable. Check that the cable works properly. You will also need a stable WiFi network with a strong signal in your hub’s location. Write down your WiFi network name and password. You will need both during setup.
Next, download the companion app for your hub on your smartphone or tablet. Most hubs require their own dedicated app. Visit your device manufacturer’s website to find the correct app. Do not download random apps with similar names, as they may not work with your hub.
Prepare a strong password for your hub account. Use at least 12 characters with uppercase letters, numbers, and symbols. Avoid using the same password across multiple devices or networks. This is critical for security.
Check your router settings before beginning. You need to know if your network uses 2.4 GHz, 5 GHz, or both frequencies. Some AI devices only work on 2.4 GHz, so this matters. You can find this information in your router’s settings or by asking your internet provider.
Have your hub’s documentation handy. Read through the quick start guide. Different hub models have different setup processes. Knowing the specifics saves you time.
Finally, ensure all your AI devices have fresh batteries or are charged. Keep them within 10 to 15 feet of where your hub will sit. This helps during the initial connection process.
Gather these items now and you are ready to move forward with confidence.
Step-by-Step: Mounting and Powering Your Hub
Your hub needs a good home and steady power to work properly. Find a central location in your space where the hub can reach all your AI devices. A central spot means better signal strength and fewer connection drops.
Choose a spot away from metal objects and thick walls. These materials block wireless signals. Keep your hub elevated on a shelf or table rather than on the floor. Higher placement helps signals travel throughout your home.
Power comes next. Plug your hub into an outlet near your chosen location. Make sure the outlet works by testing it with another device first. Your hub needs constant power to stay connected and responsive.
Avoid using extension cords if possible. Direct power connections are more stable. If you must use an extension cord, choose one rated for your hub’s power requirements.
Check that your power outlet is not controlled by a wall switch. You don’t want someone accidentally turning off your hub. Some people use smart power strips, but this adds complexity during initial setup.
Wait for startup signals. Most hubs show lights or sounds when they power on. Watch for these indicators to confirm your hub is booting up correctly. This process usually takes two to five minutes.
Keep your hub away from your router temporarily. This prevents interference during the initial connection phase. Once everything works, you can position them closer together.
Write down your hub’s physical location and power outlet number. This information helps if you need to troubleshoot later. Take a photo of your setup for your records.
Your hub is now physically ready for the next step: connecting to your WiFi network.
Step-by-Step: Connecting the Hub to Your WiFi Network
Your hub needs internet access to communicate with your AI devices and receive updates. The WiFi connection is the bridge between your physical devices and the broader smart home system.
Start by opening your companion app on your smartphone or tablet. Look for a setup or onboarding section. Most apps display a WiFi connection screen during the initial setup process.
Select your home WiFi network from the available list. Your hub will show nearby networks just like your phone does. Choose the network you use for your other devices to keep everything on the same connection.
Enter your WiFi password carefully. Passwords are case sensitive, so double check uppercase and lowercase letters. If you enter the wrong password, the hub cannot connect.
Wait for the connection confirmation. Your hub will show a light indicator or send a notification through the app when it successfully joins your network. This process usually takes 30 to 60 seconds.
Do not move forward until you see the connection confirmed. A failed connection wastes time later during device discovery.
Once connected, your app will display your hub’s status as “online” or “connected.” This confirms your hub can now communicate with the internet and your AI devices.
Test the connection by checking if you can access your hub settings from a different room using your app. If the app responds quickly, your WiFi signal is strong enough for reliable operation.
Write down your WiFi network name and password in a safe place. You will need this information when adding individual AI devices to your hub. Keep these credentials secure and separate from other passwords.
Your hub is now ready for the next phase: discovering and adding your AI devices through the companion app.
Discovering and Pairing Stubborn Devices via the Companion App
Once your hub is online and connected to WiFi, you’re ready to discover your AI devices. Open your companion app and look for a button that says “Add Device,” “Discover Devices,” or “Pair New Device.” The exact label depends on your hub’s app design.
Your app will scan your local network for available devices. This scan usually takes 30 to 60 seconds. During this time, make sure your AI devices are powered on and within range of your WiFi network. The app will display a list of devices it finds.
Select each device you want to connect from the list. Your app may ask you to confirm the device name or assign it to a specific room in your home. You can always rename devices later, so don’t worry about getting the perfect name right now.
Some devices require an additional pairing step. You might need to press a physical button on the device itself or enter a PIN code shown in the app. Follow the on screen instructions carefully. This verification step confirms that you actually own the device.
After pairing, your app will ask you to choose a hub location or zone. This helps organize your devices by room or area. Select the appropriate location from your home layout.
Test each connection immediately after pairing. Open the device settings in your app and confirm it responds to commands. If a device doesn’t respond, move it closer to your hub and try pairing again.
Once all devices show as “connected” in your app, you’ve completed the discovery and pairing process. Your AI devices are now communicating with your smart hub. You can now proceed to configure alerts and automations based on your needs.
Local vs. Cloud Connectivity: Testing What Works Offline
Testing local network functionality is critical before assuming your smart hub depends on cloud connectivity. Many people believe their devices stop working without internet, but this often isn’t true.
Start by disconnecting your modem from your router. This cuts internet access while keeping your local network alive. Your hub and AI devices can still communicate with each other through WiFi alone. Wait about two minutes for everything to stabilize after the disconnect.
Next, test basic commands on your devices. Ask your hub a simple question or trigger a basic automation. If it responds, your local network is working. If nothing happens, you’ve found a connectivity problem that needs fixing before adding more devices.
Check which features work offline and which require cloud access. Most voice commands work locally. Cloud dependent features typically include weather updates, streaming services, or external integrations. Understanding this difference helps you troubleshoot faster later.
Document what works and what doesn’t. Write down which commands succeed offline and which fail. This information becomes valuable when you’re debugging automation issues or explaining problems to support teams.
Reconnect your modem and router after testing. Verify everything works normally again with internet restored. This confirms your local network setup is solid and your devices can handle both offline and online modes.
Testing offline functionality prevents frustration down the road. You’ll know exactly what to expect if your internet drops. You’ll also understand whether connection problems stem from your local network or cloud services. This knowledge makes troubleshooting much faster and easier when issues arise later.
Securing Your Setup: Passwords, Protocols, and Best Practices
Securing your smart hub setup requires immediate action on passwords and security protocols. The moment you connect your hub to WiFi, change every default password before adding any devices. Default credentials are public knowledge, making your system vulnerable to unauthorized access.
Create strong, unique passwords for each device and your WiFi network. Use combinations of uppercase letters, lowercase letters, numbers, and symbols. Avoid birthdays, names, or sequential numbers. A password manager helps you store these securely without forgetting them.
Enable all available security protocols on your hub and connected devices. Most companion apps offer options like two factor authentication or encrypted connections. Turn these on immediately. Two factor authentication adds an extra verification step when logging in, making unauthorized access much harder.
Test your local network functionality before assuming cloud dependency. Disconnect your modem from your router to cut internet access while keeping your local network active. Run basic commands on your devices. This reveals which features work offline and which require cloud connectivity.
Document what works and what doesn’t during offline testing. Some automations function locally while others need internet access. Understanding this prevents frustration later when your internet goes down.
Never skip security setup thinking you’ll do it later. Most security breaches happen on devices with unchanged default passwords. Spend 15 minutes now securing credentials rather than dealing with compromised devices later.
After changing passwords and enabling protocols, test access from different rooms using your app. Confirm your hub responds correctly. This simple test confirms your security settings don’t block legitimate access. Only after passing these tests should you move forward with adding automations and complex configurations.
Troubleshooting Common Pairing and Connection Failures
When your AI devices refuse to connect to your smart hub, the problem usually stems from a few specific issues. Start with the basics first. Restart your hub and the device you’re trying to connect. Power off both for 30 seconds, then turn them back on.
Check your WiFi signal strength next. AI devices need a stable connection to pair properly. Move your hub closer to your router temporarily if the device keeps failing to connect. A weak signal causes most pairing failures.
Verify you’re using the correct WiFi network. Some hubs create their own temporary network during setup. Your companion app should guide you to this network. Connect your phone to it first, then proceed with device discovery.
Clear your app cache if discovery isn’t finding devices. Go to your phone’s settings, locate the app, and clear cached data. Reopen the app and try the discovery process again. This fixes many invisible connection problems.
Check for firmware updates on your hub. Outdated firmware prevents new devices from pairing. Open your hub settings in the app and look for update options. Install any available updates before attempting to connect more devices.
Reset the stubborn device to factory settings as a last resort. Most devices have a small reset button you hold for 10 seconds. After resetting, the device appears as new in your app’s discovery scan.
Test one device at a time. Adding multiple devices simultaneously creates confusion about which one failed. Complete each pairing fully before moving to the next device.
If problems persist after these steps, check your hub’s error logs in the app settings. These logs show exactly why connections are failing. Most errors point to specific solutions you can implement immediately.
Final Thoughts
Connecting stubborn AI devices to your smart hub takes patience. Most connection problems come from simple issues. Weak WiFi signals, wrong passwords, and outdated firmware cause most failures.
Start with the basics every time. Mount your hub properly and connect it to WiFi first. Then add devices one at a time through your companion app.
Security should never wait until later. Change default passwords the moment you set up a new device. This single step prevents most security problems down the road.
Test your setup before building complex automations. Disconnect your modem and check what works offline. This tells you exactly what depends on cloud access.
Avoid the temptation to build twenty automations on your first day. Start simple. Add one automation, test it, then add another. This approach saves you hours of debugging later.
Many people assume their smart hub needs constant internet access. That’s often not true. Many devices work fine on local networks alone.
Document your progress as you go. Write down which devices connected easily and which gave you trouble. This record helps you troubleshoot faster next time.
Remember that stubborn devices usually have simple fixes. Check signal strength. Verify network names. Update firmware. Reset if needed.
Smart home setup improves with practice. Each device you connect teaches you something new about your system. Your patience today builds a smoother experience tomorrow.
Take your time with each step. Rushing causes more problems than it solves. Slow, steady progress beats quick, messy setups every time.
Your smart hub will reward careful setup with reliable performance for years to come.
Frequently Asked Questions
Why won’t my AI device show up during discovery on my smart hub app?
Your device may not be on the same WiFi network as your hub. Check that both are connected to the identical network name. If they’re on different bands (2.4GHz vs 5GHz), move closer to your hub and try again. Clear your app cache and restart the discovery process. Sometimes the app needs a fresh start to find devices properly.
Can my smart hub work without internet connection?
Yes, many smart hubs function on local network only. Your hub and devices can communicate with each other even if your modem is disconnected. Test this by unplugging your modem while keeping your router on. If your automations still work, you have local connectivity. This is actually a good security feature because your devices don’t depend on cloud services for basic functions.
What’s the best order to add multiple devices to my hub?
Add devices one at a time. Mount your hub first, connect it to WiFi, then use your app to discover and add the first device. Wait for it to fully connect before adding the next one. This approach helps you identify which device causes problems if something goes wrong. Adding everything simultaneously makes troubleshooting nearly impossible.
Should I set up automations immediately after connecting devices?
Wait a few days before building automations. Let your devices settle into the network first. Test that each device responds properly from different rooms in your home. Once you confirm everything works reliably, start with simple automations. Build complexity gradually rather than creating twenty rules on day one.

Hi, I’m Simmy — the founder and voice behind AI Gadgets Insight. I’m a tech enthusiast who loves exploring the latest AI gadgets, smart devices, and innovative tech products. I started this blog to help people make smarter tech choices with honest reviews, easy-to-follow comparisons, and practical buying guides.