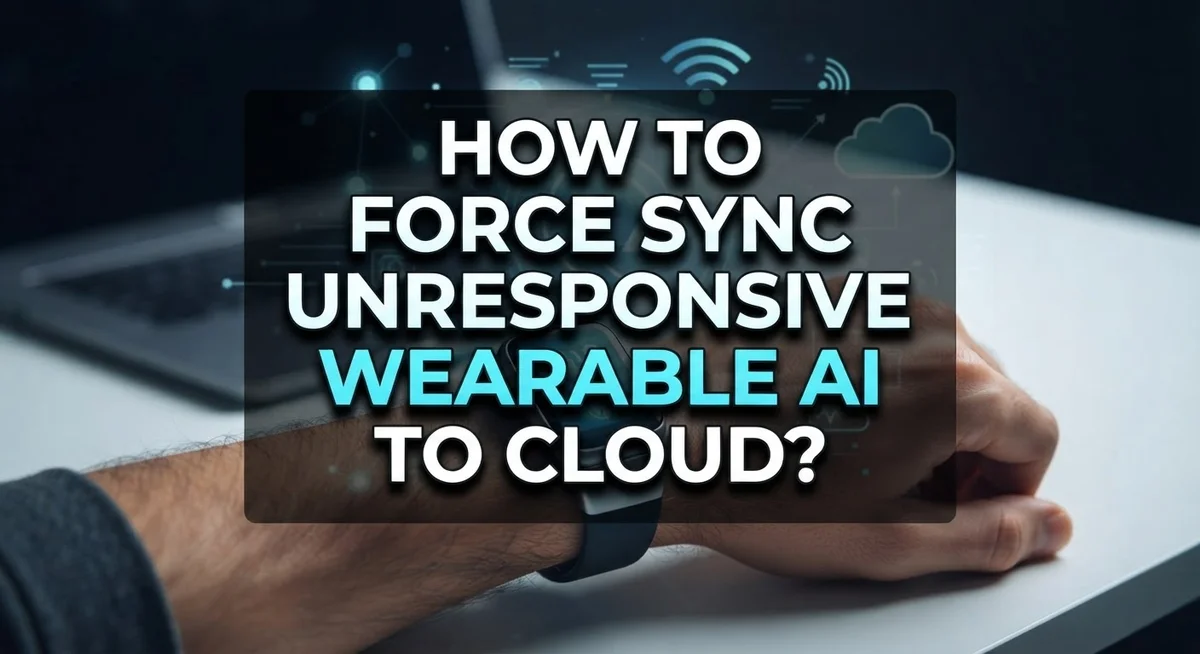
How to Force Sync Unresponsive Wearable AI to Cloud?
Your wearable AI tracks every step, heartbeat, and sleep cycle. But then it just stops talking to the cloud.
You check the app. Nothing new shows up. Your data feels stuck, and that’s frustrating.
This happens more often than you think. Devices like Samsung Health and Dekunu sometimes lose their connection to cloud storage. The sync process freezes, and your health data stays trapped on your device.
The good news? You can fix this yourself. Most sync failures come from simple issues. Think restrictive device modes, missing permissions, or shaky internet connections.
This guide walks you through practical steps to force your wearable AI to sync again. We will cover how to check your consent settings and disable modes that block syncing.
By the end, you will know exactly what to do when your wearable AI refuses to talk to the cloud. No more guessing. No more lost data. Just a clear path back to smooth syncing.
In a Nutshell
- Check your device modes first. Turn off Airplane Mode, Power Saving mode, and Watch only mode. These settings block your wearable from talking to the cloud.
- Confirm your data consent settings. Open your app and make sure “Consent to processing health data” is toggled ON. Without this, your data cannot sync at all.
- Restart both devices. Power down your wearable and your phone. Turn them back on and try syncing again. This simple step fixes most sync problems instantly.
- Force a manual sync. Go to your app settings menu and look for a sync option. You can also disconnect and reconnect the integration to trigger a fresh connection.
- Verify your internet connection. Both your wearable and phone need stable internet access. Weak WiFi or cellular signals often cause sync failures.
- Close stuck background processes. If nothing works, use Task Manager to force close unresponsive apps. This clears any frozen sync attempts holding things up.
Understanding Wearable AI Sync and Why It Fails
Wearable AI sync failures happen when your device cannot send data to cloud storage. This breaks your ability to view health metrics, activity logs, and wellness information across all your devices.
Why does sync fail? Several core issues cause this problem. Your wearable and phone need constant communication to share data. If this connection breaks, your information gets stuck on the device.
Sensor data reliability depends on successful synchronization. When sync fails, your wearable still collects information. However, that data never reaches the cloud. You cannot access it from other devices or see it in your main health dashboard.
Common sync failure causes include
Your device modes block data transfer. Airplane Mode, Power Saving mode, and Watch only mode all prevent cloud communication. These restrictive settings act as barriers between your wearable and the internet.
Permission settings control whether your device can share health data. If you did not toggle ON your consent to process wellness data, the system refuses to sync. This is a security feature, but it stops synchronization completely.
Network connectivity issues interrupt the sync process. Your wearable needs stable internet access. If your phone loses WiFi or cellular signal, the sync stalls immediately.
Background processes can become unresponsive. When your health app freezes or hangs, it cannot complete the sync operation. The data stays trapped on your device.
Understanding these failure points matters because they guide your troubleshooting steps. You now know what to check first. Most sync failures trace back to one of these core issues. Identifying which problem affects your device helps you fix it faster.
Pre-Sync Checklist: Permissions, Consent, and Connectivity
Before you attempt any sync fix, you need to verify three critical areas. These form the foundation of successful cloud synchronization.
Permissions and Consent Settings
Your wearable AI requires explicit permission to process and send health data. Open your companion app and navigate to Settings. Look for a section labeled “Consent to processing health/wellness data” or similar language. This toggle must be ON. If it shows as disabled, tap it to enable consent. Without this permission, your device cannot transfer any information to cloud servers, regardless of connectivity.
Check if your account has proper authorization levels. Some apps require you to grant permissions through your phone’s system settings as well. Go to your phone’s Settings menu, find Apps or Applications, locate your wearable’s companion app, and verify that Health or Fitness permissions are granted.
Connectivity Requirements
Both your wearable and phone need stable internet access. Check your phone’s WiFi or mobile data connection first. Open a web browser and load a website to confirm internet works. Your wearable typically syncs through your phone’s connection, so phone connectivity is essential.
Verify that Bluetooth remains active between your devices. A broken Bluetooth connection prevents any data transfer attempts.
Device Mode Verification
Disable any restrictive modes that block background activity. Turn off Airplane Mode completely. Disable Power Saving or Battery Saver modes. If your wearable has a Watch only mode, turn that off too. These modes restrict data transfer intentionally to preserve battery life.
Once you confirm permissions are enabled, connectivity is stable, and device modes allow background activity, you are ready to proceed with manual sync attempts. These three checks eliminate the most common causes of sync failures before you take additional troubleshooting steps.
Step-by-Step: Forcing a Manual Sync
Start by opening your wearable’s companion app on your phone. Look for the Settings menu, usually found at the bottom or top of the screen.
Find the cloud sync or integration section. This area controls how your device connects to cloud storage. Tap on the option that shows your current connection status.
Disconnect the integration first. This action removes the link between your wearable and the cloud temporarily. Wait about 10 seconds after disconnecting.
Now reconnect the integration. This fresh connection often triggers the sync process automatically. Your app may ask you to confirm permissions again, which is normal.
Look for a manual sync button in your app’s main settings or data menu. The button might say “Sync Now,” “Force Sync,” or “Upload Data.” Tap it to start the sync immediately.
Watch the screen for a loading indicator or progress bar. Syncing typically takes 30 seconds to 2 minutes depending on how much data needs uploading.
If the sync still appears stuck, try a different approach. Close the app completely by swiping it away or using your phone’s app switcher. Wait 15 seconds, then reopen the app and attempt the sync again.
Some apps let you trigger sync through notification panels or widgets. Check if your wearable app has a quick sync shortcut on your phone’s home screen.
Document what happens during each attempt. Note whether the sync completes, fails, or freezes. This information helps you identify patterns and decide whether you need additional troubleshooting steps.
After successful sync, verify that your data appears in the cloud portal or app dashboard. New entries should show timestamps matching when your wearable recorded them.
Disconnecting and Reconnecting Your Device Integration
When your wearable AI remains unresponsive after manual sync attempts, disconnecting and reconnecting your device integration offers a fresh start. This process clears temporary connection problems and forces your system to re-establish communication with the cloud.
Open your wearable’s companion app and navigate to the Settings menu. Look for the cloud integration or sync section. Find the option labeled “Disconnect” or “Remove Integration.” Tap it to break the current link between your wearable and cloud storage.
Wait 30 seconds before proceeding. This brief pause allows your system to fully clear the previous connection. Then locate the “Connect” or “Add Integration” button and tap it.
Your app will prompt you to log in with your account credentials. Enter your information carefully. The system will ask you to confirm permissions for data sharing. Make sure you toggle ON the consent option for processing health and wellness data. This step matters because many sync failures occur when consent remains disabled.
After reconnecting, your wearable and phone will establish a new communication channel. Return to the main sync menu and look for a “Sync Now” button. Tap it to trigger an immediate data transfer.
If your wearable still shows no response, restart both devices completely. Power down your wearable first, then your phone. Wait 10 seconds, then turn your phone back on. Once it fully loads, power on your wearable again.
During this restart, your system clears background processes that may have frozen. After both devices restart, open your app again and attempt the disconnect and reconnect process once more. This second attempt usually succeeds because your devices have reset their memory and connection protocols.
Restarting Devices and Clearing Stuck Processes
When your wearable AI becomes unresponsive, restarting devices and clearing stuck processes often solves the problem. This approach works because background tasks sometimes freeze and prevent your wearable from communicating with the cloud.
Start by force closing your wearable’s companion app. Open your device’s settings and find the application management section. Locate the health or wearable app and select “Force Stop.” This action terminates all running processes tied to that app.
Wait 30 seconds before reopening the app. This pause gives your system time to reset completely.
Next, restart your wearable device itself. Power it down completely, wait 10 seconds, then turn it back on. Many wearables have a dedicated power button or restart option in their settings menu.
After your wearable restarts, restart your phone as well. This dual restart clears stuck processes across both devices and refreshes their communication channel.
Once both devices are back online, check your internet connection. Open a web browser on your phone and load a website to confirm you have stable connectivity.
Now reopen your wearable’s companion app. The app should recognize your device and attempt to sync automatically.
If sync still fails, you may need to clear your app’s cache. Go to your phone’s settings, find the app, and select “Clear Cache.” This removes temporary files that could block syncing without deleting your personal data.
If processes remain stuck after these steps, try disconnecting and reconnecting your device integration through the app settings. This forces your wearable to establish a completely fresh connection to the cloud.
Best Practices for Reliable Ongoing Cloud Sync
Reliable ongoing cloud sync requires you to follow consistent practices that prevent future sync failures. Start by ensuring your wearable and phone maintain a stable internet connection at all times. Poor connectivity is the leading cause of interrupted data transfer, so check your WiFi signal strength before attempting any sync operations.
Next, verify that all required permissions are enabled on both devices. Your wearable app needs consent to process health and wellness data. Open your app settings and confirm this toggle is switched ON. Many sync failures happen because users forget this critical step.
Disable restrictive device modes before syncing. Power Saving mode, Airplane mode, and Watch only mode all block cloud communication. Turn these off on both your wearable and phone. Once sync completes successfully, you can re enable these modes if needed.
Create a regular sync schedule to catch problems early. Check your cloud sync status at least once daily. This habit helps you spot connection issues before data loss occurs. Most wearable apps show your last successful sync time in the settings menu.
Keep your companion app and wearable firmware updated at all times. Developers release updates that fix sync bugs and improve reliability. Check for available updates weekly through your device settings.
Finally, monitor your cloud storage space. When your account reaches capacity, sync operations fail silently. Review your cloud account regularly and remove old data you no longer need. This maintenance ensures smooth, uninterrupted data transfer going forward.
Common Mistakes That Cause Repeated Sync Failures
Sync failures often happen because users make preventable mistakes. Understanding these errors helps you fix problems faster.
Leaving restrictive device modes active is the most common mistake. Power Saving mode limits your wearable’s background activity. Airplane Mode blocks all wireless connections. Watch only mode prevents your device from communicating with your phone. You must disable these modes before attempting any sync. Check your device settings and turn off anything that restricts connectivity.
Skipping account permission checks causes repeated failures. Your wearable needs consent to process health and wellness data. This permission must be toggled ON in your app settings. Many users overlook this step and wonder why sync never works. Always verify your consent settings are active before troubleshooting.
Not checking internet connectivity is another frequent error. Your wearable cannot sync without a stable connection on both devices. Test your phone’s internet first. Then verify your wearable can access your network. Weak WiFi signals or mobile data issues prevent successful uploads to cloud storage.
Attempting sync without restarting devices wastes your time. Background processes sometimes freeze without you knowing. A simple restart clears these stuck processes and refreshes your system. Many users skip this basic step and jump straight to complex solutions.
Finally, users often forget to check account permissions after updating their app. New app versions sometimes reset your consent settings. Your wearable loses permission to sync even though nothing else changed. Review your permissions after every update to prevent unexpected failures.
These mistakes compound each other. One error leads to another, making your sync problems seem worse than they are. Avoiding these mistakes prevents most sync issues from occurring in the first place.
Troubleshooting Persistent Sync Issues
When your wearable AI stays stuck and won’t sync, you need to force a manual sync through your app’s settings. This direct approach often works when automatic syncing fails.
Start by opening your wearable’s companion app on your phone. Look for a settings or options menu. Most apps have a sync button or “Sync Now” option you can tap immediately. This manual trigger sends a command to push your data to the cloud right away.
If the manual sync button doesn’t work, try disconnecting your cloud integration completely. Go to your account settings and find the option to disconnect or unlink your wearable. Wait about 10 seconds. Then reconnect your wearable to your cloud account. This fresh connection often resets the sync pathway and gets stuck data moving again.
Check your data permissions before reconnecting. Make sure you’ve toggled ON any consent options for health or wellness data processing. Your wearable cannot sync if these permissions are disabled.
Next, verify your internet connection on both devices. Open a web browser and load a website to confirm connectivity. Weak or unstable networks block cloud uploads even when your wearable appears connected.
If manual sync still fails, disable any restrictive modes on your phone. Turn off Power Saving mode, Airplane mode, and any watch-only settings. These modes restrict background data transfer and prevent your wearable from reaching the cloud.
Finally, check if your cloud storage has available space. Full storage accounts cannot accept new data uploads. Clear unnecessary files or upgrade your storage if needed.
These force sync methods address the most common causes of unresponsive wearable uploads.
Final Thoughts
Force syncing your wearable AI does not need to feel hard. Most sync failures come from simple issues. A restrictive device mode, a missing permission, or a weak connection often causes the problem.
Start with the basics every time. Check your internet connection first. Then verify that your device modes are not blocking sync.
Consent settings matter more than people realize. Your wearable needs permission to send health data. Skipping this step causes many sync failures.
When basic steps fail, restart your devices. A simple restart clears temporary glitches. It also resets background processes that block syncing.
If restarting does not work, disconnect and reconnect your integration. This forces your wearable to create a fresh connection with the cloud. It often fixes stubborn sync issues.
Manual syncing works well when automatic sync stalls. Your app’s settings menu usually has this option. Use it whenever your data feels outdated.
Patience helps during troubleshooting. Some fixes take a few minutes to show results. Give your device time before trying another method.
Remember that these issues are common. Samsung Health, Dekunu, and similar platforms experience sync problems too. You are not alone when this happens.
The good news is that most fixes are quick. You do not need technical skills to solve them. Simple checks and restarts solve most problems.
Once your wearable syncs again, keep your habits consistent. Update your apps regularly. Check your permissions after every update.
Reliable sync depends on small, steady habits. When you follow these steps, your wearable stays connected. Your data stays safe in the cloud, ready whenever you need it.
Frequently Asked Questions
Why does my wearable AI fail to sync with the cloud?
Sync failures happen for a few main reasons. Your device may have restrictive modes enabled, like Power Saving or Airplane Mode. Permissions might be turned off in your account settings. Your internet connection could be unstable on either your phone or wearable. Sometimes the cloud integration simply needs a fresh restart to work properly again.
How do I manually force a sync right now?
Open your wearable’s companion app on your phone. Look for a Settings or Sync menu option. Find the button to disconnect your cloud integration completely. Wait a few seconds, then reconnect it. This forces a fresh sync attempt. If no manual sync button appears, try closing the app entirely and reopening it.
What should I check before attempting to sync?
First, verify your internet connection is stable on both devices. Second, check that you’ve toggled ON any consent options for health or wellness data in your account settings. Third, disable Power Saving Mode and Airplane Mode on your phone and wearable. Fourth, make sure your cloud storage has available space. These checks prevent most sync problems.
What if my wearable still won’t sync after these steps?
Restart both your phone and wearable completely. Power them down fully, wait 30 seconds, then turn them back on. Next, open your companion app and attempt the disconnect and reconnect process again. If sync remains stuck, try ending background processes through your device’s task manager. This clears stuck data that blocks syncing.
Can I sync without restarting my devices?
Manual sync sometimes works without a restart if you disconnect and reconnect your integration quickly. However, restarting devices first makes sync far more reliable. A full restart clears temporary errors that prevent data transfer. This step saves time and frustration in the long run.

Hi, I’m Simmy — the founder and voice behind AI Gadgets Insight. I’m a tech enthusiast who loves exploring the latest AI gadgets, smart devices, and innovative tech products. I started this blog to help people make smarter tech choices with honest reviews, easy-to-follow comparisons, and practical buying guides.