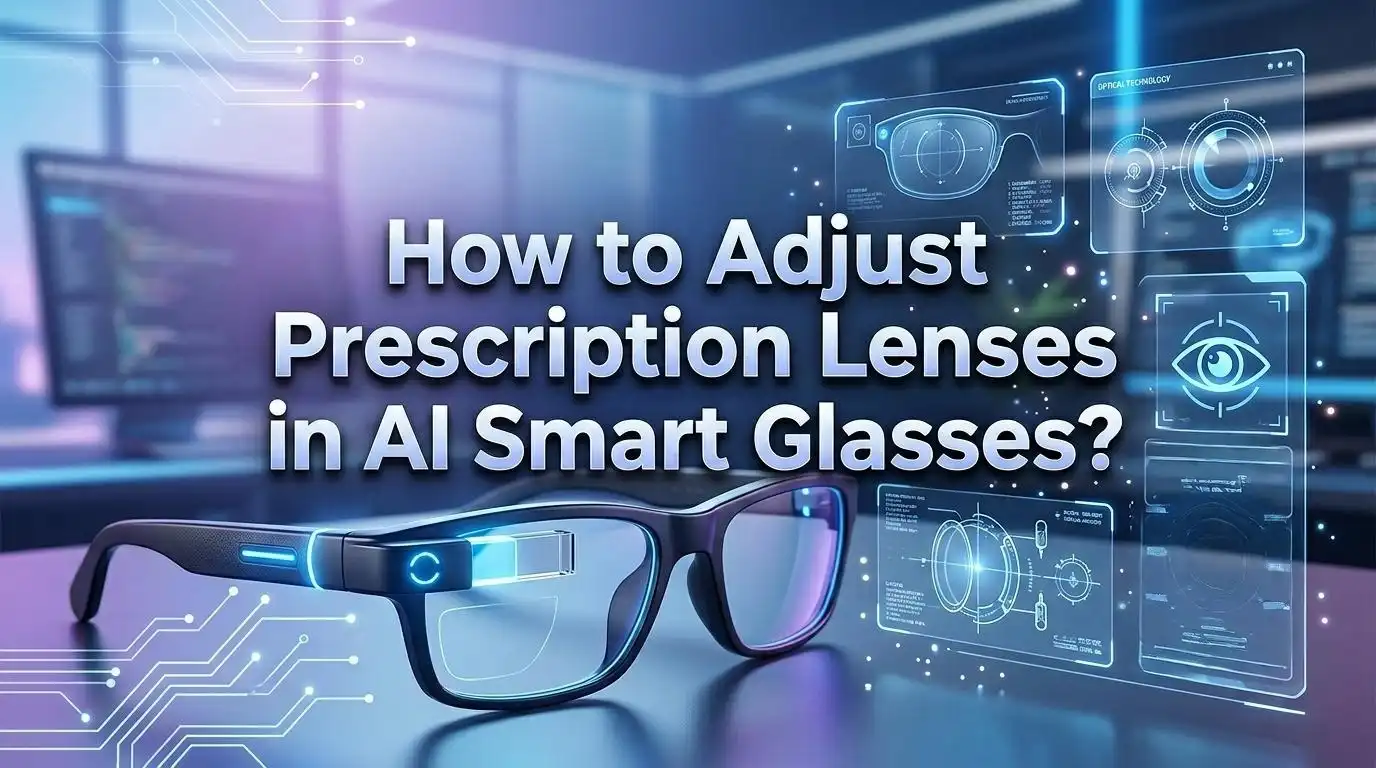
How to Adjust Prescription Lenses in AI Smart Glasses?
Are you struggling to get prescription lenses to work properly in your AI smart glasses? You are not alone. Millions of people wear corrective lenses, and the growing market of AI smart glasses has created a new challenge: how do you combine clear vision correction with cutting edge digital technology on your face?
The good news is that adjusting prescription lenses in AI smart glasses is very doable once you know the right methods.
This guide walks you through every method, every adjustment technique, and every common problem you might face so you can enjoy both crystal clear vision and seamless smart features without compromise.
Key Takeaways
- Prescription integration in AI smart glasses uses two primary methods: bonded lenses that fuse correction directly into the display lens, and clip in or magnetic inserts that attach separately to the frame interior. Each method requires different adjustment steps and has distinct pros and cons for daily use.
- Proper optical alignment is critical for comfort and display clarity. The center of each prescription lens must line up with your pupils both horizontally and vertically. Even a small misalignment causes eye strain, blurry heads up display content, and headaches after extended wear.
- Autofocus smart glasses with liquid crystal lenses represent a newer option that adjusts prescription strength automatically using eye tracking sensors. These reduce the need for manual adjustment but still require proper physical frame fitting.
- Your pupillary distance (PD) measurement is the single most important number for getting prescription lenses right in smart glasses. Always get this measured by a professional before ordering any prescription inserts or bonded lenses.
- Frame fit adjustments on smart glasses differ from regular eyewear because you must avoid bending or applying pressure near electronic components, speakers, cameras, and charging contacts embedded in the temples and bridge.
- Third party lens providers and manufacturer direct options both exist, and comparing their prescription ranges, coatings, and return policies before ordering saves time and money in the long run.
Understanding Prescription Lens Types for AI Smart Glasses
Before you adjust anything, you need to understand what type of prescription lens system your AI smart glasses use. The lens integration method determines your adjustment options and limits.
Bonded lenses fuse a custom prescription lens directly onto the waveguide display lens. This creates a single, slim optical unit that looks and feels like standard eyewear. Models like the Even G2 use this approach. The prescription is permanent in the lens, so “adjusting” means ensuring the frame sits correctly on your face for proper optical alignment.
Clip in or magnetic inserts are separate prescription lenses that attach behind the main lens of the smart glasses. Models from brands like RayNeo and XREAL use this method. These inserts can be removed, swapped, and repositioned, which gives you more flexibility but also more things to adjust.
Autofocus liquid crystal lenses represent the newest category. Companies like IXI use eye tracking sensors combined with liquid crystals that change optical power in real time based on where you look. A small voltage shifts the crystal alignment to adjust focus instantly. These still require a proper frame fit, but the prescription itself adapts automatically.
Each type has a different adjustment process. Bonded lenses need frame level adjustments. Inserts need both frame and insert alignment. Autofocus lenses need frame fitting plus software calibration through a companion app.
How Bonded Prescription Lenses Work in Smart Glasses
Bonded lens technology is one of the most seamless ways to add vision correction to AI smart glasses. Understanding how it works helps you know what you can and cannot adjust.
In this method, a digitally surfaced prescription lens is permanently fused to the waveguide display element. The waveguide is the optical component that projects digital information from a tiny micro projector into your field of view. By bonding these two layers into one unit, the result is an ultra thin lens with no air gap between the correction layer and the display layer.
This matters for adjustment because there are no separate pieces to reposition. You cannot rotate or shift the prescription element independently. All adjustments happen at the frame level. You adjust how the glasses sit on your nose, how the temples grip behind your ears, and how the frame angle positions the lenses relative to your eyes.
The major advantage is simplicity and durability. No dust can get trapped between lens layers. The glasses stay lighter because there is only one lens element per eye. The optical path remains clean and consistent.
Pros of bonded lenses: Slim profile, no dust between layers, lightweight, looks like regular glasses, single clean optical path for both vision correction and display.
Cons of bonded lenses: Cannot swap lenses yourself, prescription updates require a full lens replacement from the manufacturer, higher upfront cost, and limited to the prescription ranges the manufacturer supports.
How Clip In and Magnetic Prescription Inserts Work
The insert method is the most common approach across AI and AR smart glasses. Custom made prescription lenses attach to the inside of the frame using either magnetic connections or mechanical clips.
These inserts sit between your eyes and the main lens of the smart glasses. They are made to your specific prescription, including sphere, cylinder, and axis values. Most inserts support single vision correction for nearsightedness up to about negative 10.00 diopters and astigmatism up to negative 2.00 diopters, though this varies by brand.
The key advantage of inserts is flexibility. You can remove them for cleaning. Multiple users can share the same pair of smart glasses by swapping inserts. If your prescription changes, you replace only the insert, not the entire device. You can also switch between clear inserts and tinted inserts for indoor and outdoor use.
Adjustment with inserts involves two layers. First, you adjust the frame to fit your face correctly. Second, you ensure the insert is properly seated, centered, and secure within the frame. A loose insert can shift during head movement, which causes the optical center to drift away from your pupils.
Pros of inserts: Easy to swap, multiple users can share one device, cheaper prescription updates, available from third party providers, supports tinted and clear options.
Cons of inserts: Adds bulk and weight to the front of the glasses, can trap dust between the insert and main lens, may feel front heavy after long wear, and the insert connection point can loosen over time.
Step by Step: Adjusting Bonded Prescription Lenses
Adjusting bonded prescription lenses is really about adjusting the frame fit so the lenses sit in the correct position relative to your eyes. Here is how to do it.
Step 1: Check the nose pad position. The nose pads control how high or low the glasses sit on your face. If the lenses are too high, your pupils will sit below the optical center, causing strain. Gently push the nose pads closer together to raise the frame, or spread them apart to lower it. On smart glasses, be careful not to apply force near any sensors on the bridge.
Step 2: Adjust the temple arms. The temples should follow the curve behind your ears without squeezing. If the glasses slide forward, the temples need to curve more tightly behind the ears. Use gentle, gradual bends on the temple tips only. Never bend the temple near the hinge or midpoint on smart glasses because electronic components, speakers, and batteries sit in these areas.
Step 3: Check the pantoscopic tilt. This is the angle at which the lenses tilt relative to your face. The bottom of the lenses should sit slightly closer to your face than the top. A correct tilt of about 8 to 12 degrees improves optical performance, especially for progressive lenses.
Step 4: Verify pupil alignment. Look straight ahead into a mirror. Your pupils should sit near the center of each lens, or slightly above center for progressive lenses. If alignment looks off after your adjustments, visit an optician for a professional fitting.
Step by Step: Adjusting Clip In Prescription Inserts
Clip in inserts require both frame fitting and insert positioning. Follow these steps for a clear, comfortable experience.
Step 1: Fit the frame first. Before attaching any insert, adjust the frame to your face using the same nose pad, temple, and tilt techniques described above. The frame must be stable and comfortable on its own before you add the insert.
Step 2: Clean all surfaces. Use a microfiber cloth to wipe both the inside surface of the main lens and both surfaces of the prescription insert. Any dust or smudge trapped between the two layers will be visible and distracting once the insert is attached.
Step 3: Align the insert with the frame. Most inserts have a specific orientation. Look for a small notch, marker, or label indicating left and right or top and bottom. Hold the insert by its edges and position it over the interior of the frame.
Step 4: Attach the insert firmly. For magnetic inserts, bring the insert close to the frame and let the magnets guide it into place. You should feel a definite click or snap. For clip on inserts, press the attachment points until they lock. Gently tug the insert after attachment to make sure it does not shift or wobble.
Step 5: Test alignment with a focus check. Put the glasses on and look at text at different distances. Check that the heads up display content appears sharp. If you notice blur or distortion, remove the insert and reattach it, making sure it is fully seated and level.
How Autofocus Liquid Crystal Lenses Adjust Automatically
Autofocus technology is a newer option that changes how prescription adjustment works in smart glasses. Finnish company IXI has developed glasses with liquid crystal lenses and embedded eye tracking sensors that adjust focus in real time.
Here is how it works. Small infrared sensors in the frame track your eye movements and determine the distance to whatever you are looking at. The system then applies a small electric voltage to the liquid crystals embedded in the lens. This voltage causes the crystals to rearrange, which changes the optical power of the lens instantly. The entire process takes milliseconds and happens continuously as your gaze shifts between near and far objects.
For users with presbyopia (age related difficulty focusing on close objects), this technology is especially useful. Instead of wearing progressive lenses with fixed zones for near, intermediate, and far vision, the entire lens surface adjusts to the correct power for your current focal distance.
Calibration is done through a companion phone app. You input your base prescription, and the system uses that as a starting point. The eye tracking then handles real time adjustments around that baseline. Some systems also allow you to fine tune the lens strength manually through the app if the automatic adjustment does not feel quite right.
Pros of autofocus lenses: No need for progressive zones, adapts to changing prescriptions over time, full lens surface adjusts (no restricted viewing zones), works for both near and far vision seamlessly.
Cons of autofocus lenses: Requires battery power, higher cost, newer technology with limited availability, and the glasses are slightly heavier due to the embedded sensors and electronics.
Getting Your Pupillary Distance Right
Pupillary distance (PD) is the measurement in millimeters between the centers of your two pupils. It is the most critical number for any prescription lens adjustment in smart glasses.
If your PD measurement is off by even 2 to 3 millimeters, the optical centers of your lenses will not align with your pupils. This misalignment causes eye strain, headaches, and a blurry or distorted heads up display. In smart glasses, where the display projection path depends on precise lens geometry, a wrong PD can make the digital overlay appear shifted or unreadable.
The best way to get your PD measured is during a professional eye exam. Ask your optometrist to include it on your prescription. Some prescriptions do not list PD by default, so you may need to request it specifically. A typical adult PD ranges from 54 to 74 millimeters.
You can also measure PD at home using a ruler and a mirror, but this method is less accurate. Stand about 30 centimeters from a mirror. Hold a ruler against your brow. Close your right eye and align the zero mark with the center of your left pupil. Then close your left eye, open your right, and read the measurement at the center of your right pupil.
For smart glasses with clip in inserts, the PD affects where the insert manufacturer grinds the optical center on the lens. For bonded lenses, the PD determines how the prescription layer is positioned relative to the waveguide display. Always double check your PD before placing any order for prescription smart glass lenses.
Avoiding Common Mistakes During Lens Adjustment
Several common mistakes can ruin the prescription lens experience in AI smart glasses. Knowing these pitfalls saves you time and frustration.
Mistake 1: Bending the frame near electronic components. Smart glasses have speakers, microphones, cameras, and batteries hidden in the temples and bridge. Applying force to these areas can damage circuits or crack internal connections. Always bend only at the temple tips (the curved ends behind your ears) and at the nose pads.
Mistake 2: Using heat to adjust the frame. Traditional opticians sometimes use warm water or heat tools to soften acetate frames for bending. This can damage the electronics, batteries, or adhesive seals in smart glasses. Avoid heat entirely unless the manufacturer specifically says it is safe.
Mistake 3: Ignoring the insert orientation. Prescription inserts have a specific left and right lens, and a correct top and bottom. Installing an insert upside down or in the wrong eye puts the astigmatism correction axis in the wrong position. This causes immediate discomfort and blurry vision.
Mistake 4: Skipping the cleaning step. Dust trapped between an insert and the main lens creates visible specks that cannot be wiped away while the insert is attached. Always clean both surfaces before snapping the insert in place.
Mistake 5: Wearing the glasses before the insert is fully locked. A partially attached magnetic insert can fall out during head movement, potentially scratching the main lens or landing on a hard surface and cracking. Verify the attachment is secure every time you put the insert in.
How to Check if Your Prescription Lenses Are Properly Aligned
After making any adjustment, you need to verify that everything is correct. Here are practical checks you can do at home.
The mirror test. Put on your smart glasses and stand in front of a mirror. Look straight ahead. Your pupils should appear centered in each lens. If one lens is noticeably higher than the other, or if your pupils sit near the edge of a lens, the frame needs further adjustment.
The text test. Hold a book or phone screen at your normal reading distance. Text should appear sharp and clear through the center of each lens. Move your eyes to the edges of the lenses. Some blur at the very edges is normal, especially with single vision lenses, but significant distortion suggests the optical center is not aligned with your pupil.
The display test. Activate the smart glasses display or heads up content. The projected text or icons should appear crisp and readable. If the display looks shifted, doubled, or blurry even though your distance and near vision seem fine through the lenses, the prescription may be interfering with the waveguide projection path. This sometimes happens with very strong prescriptions or high cylinder values.
The comfort test. Wear the glasses for at least 30 minutes doing normal activities. Any persistent headache, eye strain, or pressure on the nose or behind the ears means something needs further adjustment. Mild discomfort in the first few minutes is normal as your eyes adapt, but it should not last.
If any of these tests reveal problems, try readjusting the frame position first. If issues persist, consult a professional optician who has experience with smart eyewear.
When to Visit a Professional Optician
Some adjustments are best left to professionals, especially with smart glasses that contain delicate electronics.
Visit an optician if your prescription is complex. Progressive lenses, high cylinder values for astigmatism, or prism corrections all require precise positioning that is difficult to achieve through DIY frame bending. An optician has the tools and training to measure the exact lens height, segment position, and pantoscopic tilt needed for your correction type.
Visit an optician if the frame needs significant reshaping. Smart glasses frames are more rigid than standard eyewear because they house electronic components. If the frame does not fit your face shape well out of the box, a professional can identify which specific areas can be safely adjusted without risking damage to internal hardware.
Visit an optician if the display looks wrong after your adjustments. A misaligned prescription can distort the heads up display content in ways that are hard to diagnose without professional equipment. An optician can use a lensometer to verify that the prescription in your inserts or bonded lenses matches what was ordered and check that the optical centers sit where they should.
Many smart glasses manufacturers now partner with specific optical chains and independent opticians who are trained on their products. Check the manufacturer website for a list of certified fitting locations near you. This is especially important for bonded lens systems where the lens cannot be adjusted independently of the frame.
Maintaining Your Prescription Lenses in Smart Glasses
Proper maintenance keeps your prescription lenses performing well and extends the life of both the lenses and the smart glasses.
Clean lenses daily with a microfiber cloth. Avoid paper towels, tissues, or clothing fabric, as these can scratch coatings over time. For stubborn smudges, use a small amount of lens cleaning solution or lukewarm water. Never use household glass cleaners, alcohol, or acetone on smart glasses lenses because these chemicals can damage anti reflective coatings and electronic seals.
Store your smart glasses in a hard case when not in use. Smart glasses are more expensive to replace than regular eyewear, and a cracked prescription lens in a bonded system means a costly full lens replacement. A hard case also protects the frame electronics from accidental impacts.
Remove and clean inserts weekly. If you use clip in prescription inserts, take them out once a week to clean the surfaces between the insert and the main lens. This prevents dust buildup that gradually reduces optical clarity.
Check insert attachment points monthly. Magnetic strength can weaken slightly over time, and clip mechanisms can loosen. If your insert feels less secure than it did originally, contact the manufacturer for a replacement insert frame or attachment component.
Avoid leaving smart glasses in hot environments. Car dashboards, direct sunlight, and heated surfaces can warp frames, damage batteries, and degrade lens coatings. Smart glasses are particularly sensitive to heat because of the combination of electronic components and optical elements.
Cost of Prescription Lens Adjustment and Replacement
Understanding the costs involved helps you plan ahead and avoid surprises.
Prescription inserts typically cost between $80 and $200 depending on the brand, your prescription strength, and the coatings you choose. Anti reflective coatings, blue light filtering, and photochromic (light adaptive) options add to the price. Third party providers sometimes offer lower prices than the manufacturer direct option, but quality and warranty coverage vary.
Bonded lens replacements are more expensive, often ranging from $150 to $400 or more. Because the prescription is fused to the display waveguide, replacing it is a factory level process. This cost is something to factor in if your prescription changes frequently. Younger users whose prescriptions are still shifting may find inserts more cost effective in the long run.
Autofocus systems have the highest upfront cost but potentially save money over time because the liquid crystal lenses adapt to prescription changes without requiring physical lens replacements. However, if the electronic adjustment system fails, repair costs are significant.
Professional optician adjustments for frame fitting are often free or low cost if you purchased the glasses from that provider. Independent adjustments for smart glasses frames typically cost $15 to $40. Always confirm that the optician is comfortable working with electronic eyewear before handing over your smart glasses.
Pros of investing in quality lenses and coatings: Better clarity, longer lifespan, reduced eye strain, and improved display readability.
Cons of higher cost options: Larger upfront investment, and premium coatings still degrade over time and eventually need replacement.
Choosing Between DIY and Professional Adjustment
The decision between adjusting your prescription smart glasses yourself or visiting a professional depends on the type of adjustment needed and your comfort level.
DIY adjustment works well for simple nose pad repositioning, temple tip bending for a snugger fit behind the ears, and inserting or swapping clip in prescription inserts. These tasks carry low risk if you follow the steps carefully and avoid applying force near electronic components. Most smart glasses come with a basic fitting guide that covers these adjustments.
Professional adjustment is better for significant frame reshaping, progressive lens alignment, verifying optical center positions with a lensometer, and troubleshooting display distortion caused by lens interactions. An optician can also identify subtle fit issues that you might not notice yourself but that cause cumulative strain over hours of wear.
A good middle ground is to do your initial setup at home using the manufacturer instructions, wear the glasses for a few days, and then visit an optician for fine tuning based on your real world experience. This way, you can describe specific problems (such as “the display blurs when I look up” or “I feel pressure on my left temple after two hours”) and the optician can make targeted corrections.
Keep in mind that smart glasses frames are less forgiving than regular frames. Overbending a temple arm on standard glasses is a minor issue that an optician can fix. Overbending a smart glasses temple could crack a speaker housing or disconnect an internal wire. When in doubt, err on the side of professional help.
Frequently Asked Questions
Can I use my existing prescription glasses lenses in AI smart glasses?
No, you cannot transfer lenses from your regular glasses into AI smart glasses. Smart glasses frames have specific dimensions, lens shapes, and mounting systems that differ from standard eyewear. Prescription inserts and bonded lenses must be custom made to fit the specific smart glasses model you own. You will need to provide your prescription details to the manufacturer or a compatible lens provider who will create new lenses shaped for your smart glasses.
How often should I update my prescription in my smart glasses?
You should update your prescription whenever your eye care professional identifies a change during your regular eye exam, which is typically every one to two years for adults. If you notice increased eye strain, blurry vision, or headaches while wearing your smart glasses, schedule an eye exam sooner. For autofocus liquid crystal lens systems, minor prescription changes may be handled through software recalibration without needing new physical lenses.
Will prescription lenses affect the camera or speakers in my smart glasses?
Prescription lenses do not affect the cameras, speakers, or microphones in AI smart glasses. These components are located in the frame temples and along the top edge of the frame, away from the lens area. However, very thick lenses from strong prescriptions can slightly alter the weight balance of the glasses, which may shift how the frame sits on your face and indirectly affect microphone positioning relative to your mouth.
Can I wear contact lenses instead of adjusting prescription smart glasses?
Yes, wearing contact lenses is a valid alternative. Many users choose contacts so they can use their AI smart glasses with standard non prescription lenses. This avoids the cost of prescription inserts or bonded lenses and keeps the glasses lighter. The trade off is that you must be comfortable wearing contacts daily and deal with the care routine that comes with them.
What should I do if my prescription inserts keep falling out?
First, check that you are attaching the inserts in the correct orientation and fully seating them until you feel the magnetic snap or clip lock. If the inserts still fall out, the magnetic or clip mechanism may be worn. Contact the insert manufacturer for a replacement attachment frame. Avoid using adhesive tape or glue as a temporary fix because residue can damage the main lens coating and block sensors on the frame interior.
Are progressive lenses available for all AI smart glasses models?
Not all models support progressive lenses. Some smart glasses only accommodate single vision inserts due to the way their display optics interact with the lens. Bonded lens systems like the Even G2 do support progressive lenses, but these must be fitted through certified optician partners rather than ordered online. Always verify progressive lens compatibility with the specific smart glasses model before purchasing.

Hi, I’m Simmy — the founder and voice behind AI Gadgets Insight. I’m a tech enthusiast who loves exploring the latest AI gadgets, smart devices, and innovative tech products. I started this blog to help people make smarter tech choices with honest reviews, easy-to-follow comparisons, and practical buying guides.